To update a transaction’s payee or category on the “Needs Review” tab, simply open the dropdown under “Payee” or “Category” for the transaction and select the new Payee and/or Category that you wish to update the transaction to. As soon as you make your selection for the transaction, the changes will automatically be synced and updated in the client’s QuickBooks Online (QBO) or Xero account.

Add a new payee
If you need to add a new payee, simply open the “Payee” dropdown and start typing the name. You will see an “Add” option appear that you can click.
If you need to add a new payee, simply open the “Payee” dropdown and start typing the name. You will see an “Add” option appear that you can click.
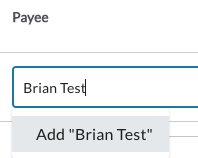
After you click “Add,” a pop-up named “Add Vendor/Payee” will appear, where you can finish adding the name and select the type of payee (vendor/customer). When finished, click the “Save Changes” button.
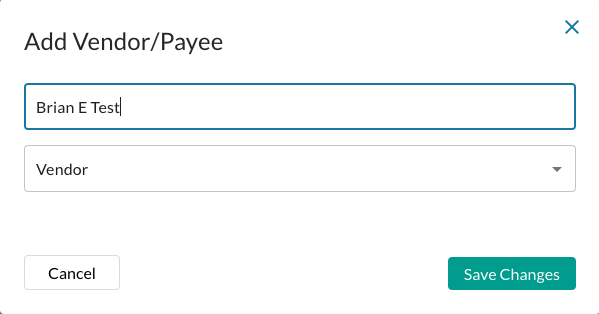
After the changes have been saved, the new payee will be added to the “Payee” field.
Edit a Payee on a Deposit Line Item
For QBO clients ONLY: in the Edit modal of Transaction Manager, deposit transactions display a Payee column defaulting to the same payee set in the main table. When splitting a deposit, users can add a different payee to each line item, allowing them to categorize their deposits directly within Transaction Manager.

Above: The Payee column location.

Above: A row has been added to split the transaction, and the user is selecting the Payees.

Above: The deposit has been split and all payees and categories identified.