To complete any part of the setup manually, you'll start from the first step you left unfinished in the wizard and proceed through the remaining steps.
Step 1: If you did not complete step 1 in the Add Client wizard, it's best to simply use the Add Client wizard to get your client added to the platform
Step 2: Connect the GL
Step 3: Connect Accounts
Step 4: Link Accounts and Automate
Step 5: Customize AI
Step 2: Connect GL (QBO & Xero Clients only)
For QuickBooks Online and Xero clients:
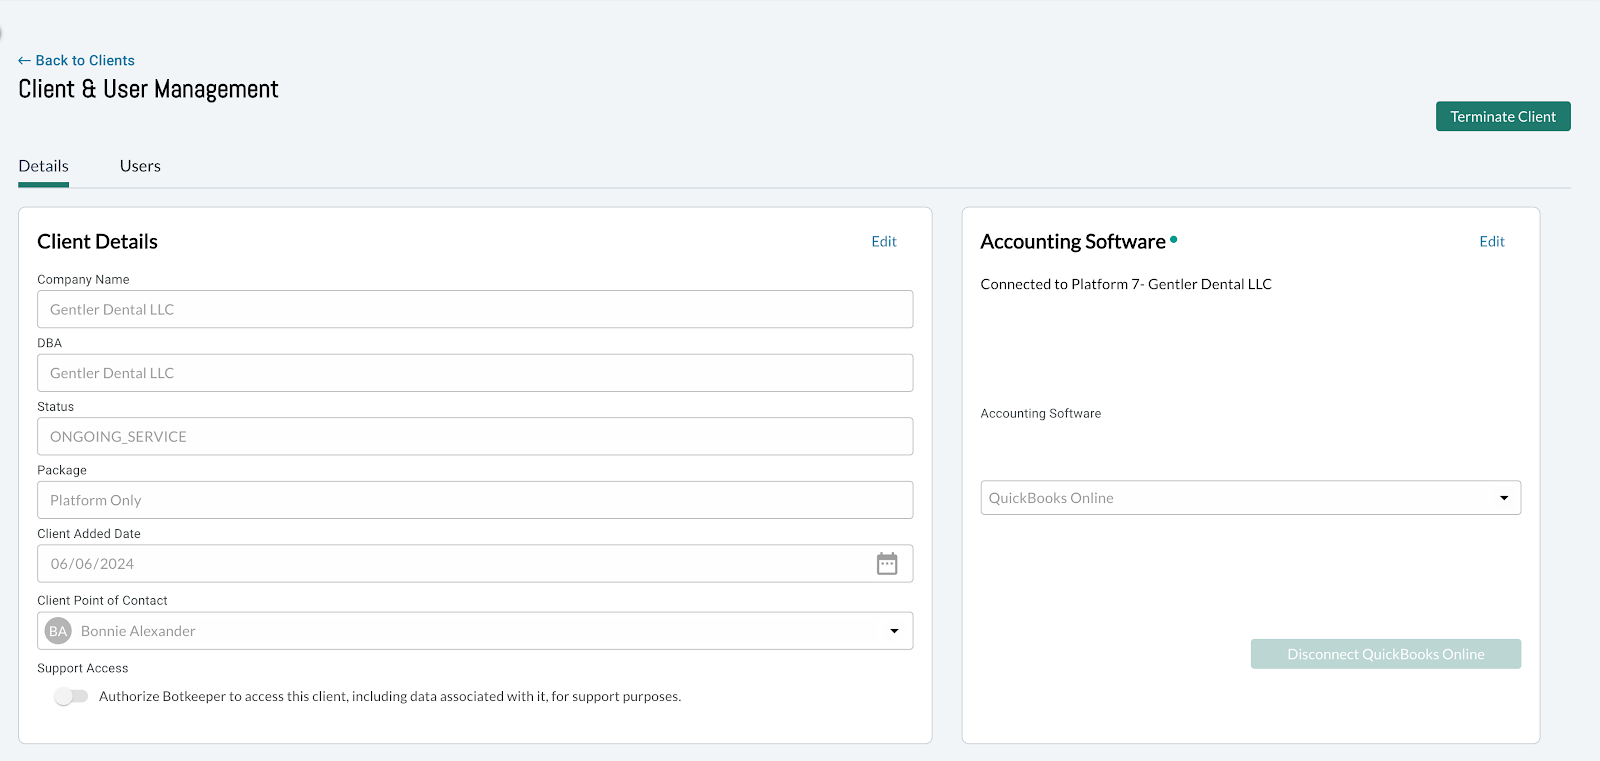
- Navigate to the Client & User Management module.
- Click on the Client tab
- Click on the respective client name
- The Client Details window will appear
- Click on Edit in the Accounting Software tile on the right side of the screen.
You will see a Connect to QuickBooks Online or Connect to Xero button. Click on that button and follow the onscreen prompts to authenticate the client via the QuickBooks Online or Xero authentication workflow.
Step 3: Connect Accounts
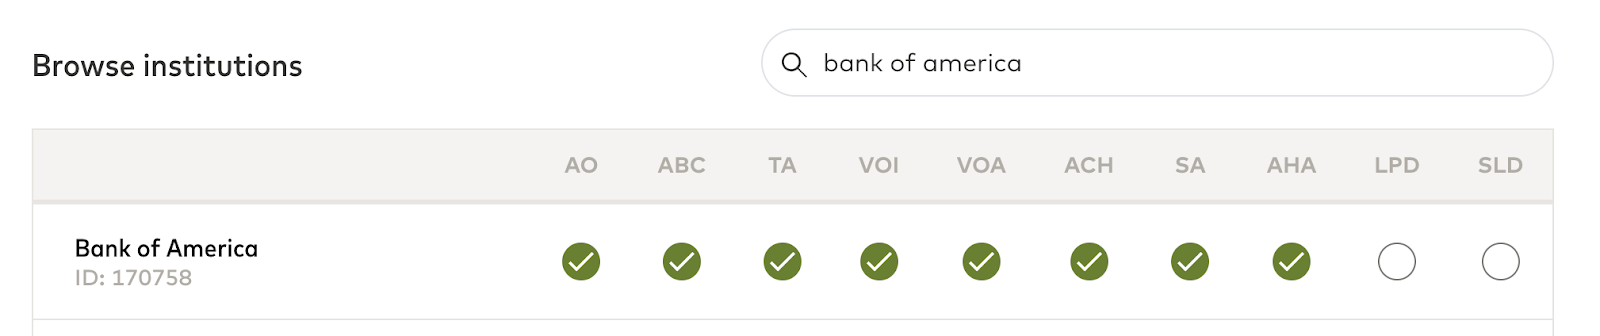
Determine which client bank and credit card accounts can be connected to Botkeeper via Smart Connect by using this link to search whether it is Finicity supported.
1. Type in the name of the institution:
-
- Green checkbox in the TA column means transaction aggregation is available and the account can be connected in Smart Connect.
- Green checkbox in the SA column means it supports statement fetching
- By default if you connect an account that supports statement fetching it is enabled in Smart Connect. You can always disable this by ticking the toggle off in the Smart Connect page
2. Determine the type of access you have
-
- If you do not have access, you can either invite the client in as a user and request that they make the connection or use the smart link feature so your client can make the connection without needing to be a user in the platform.
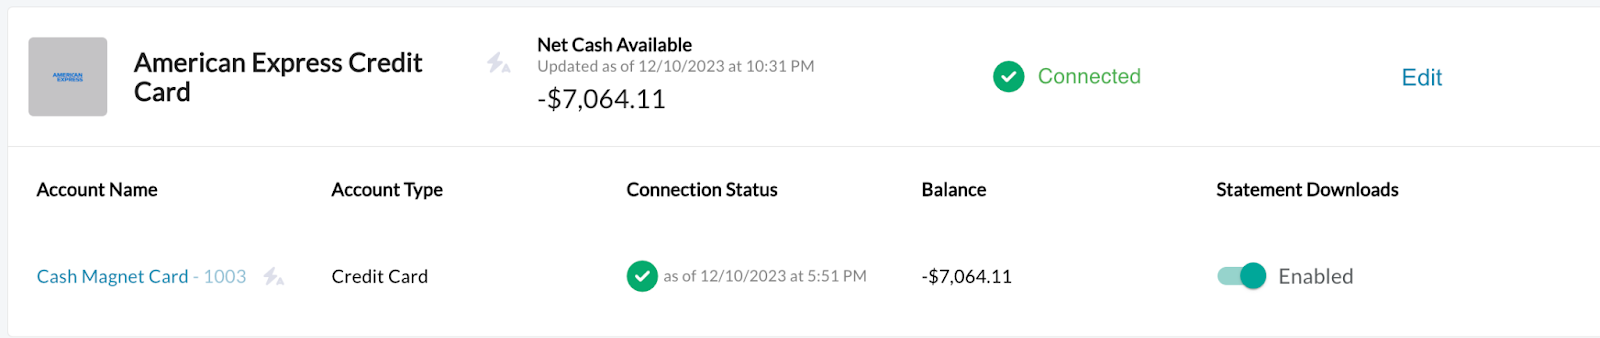
- If you DO have access, you can connect the accounts yourself by going to Smart Connect and clicking Add New in the top right corner:

Step 4: Link Accounts & Automate (QBO & Xero Clients only)
Once connections are made in Smart Connect, go to Transaction Manager and click on the Configurations tab.
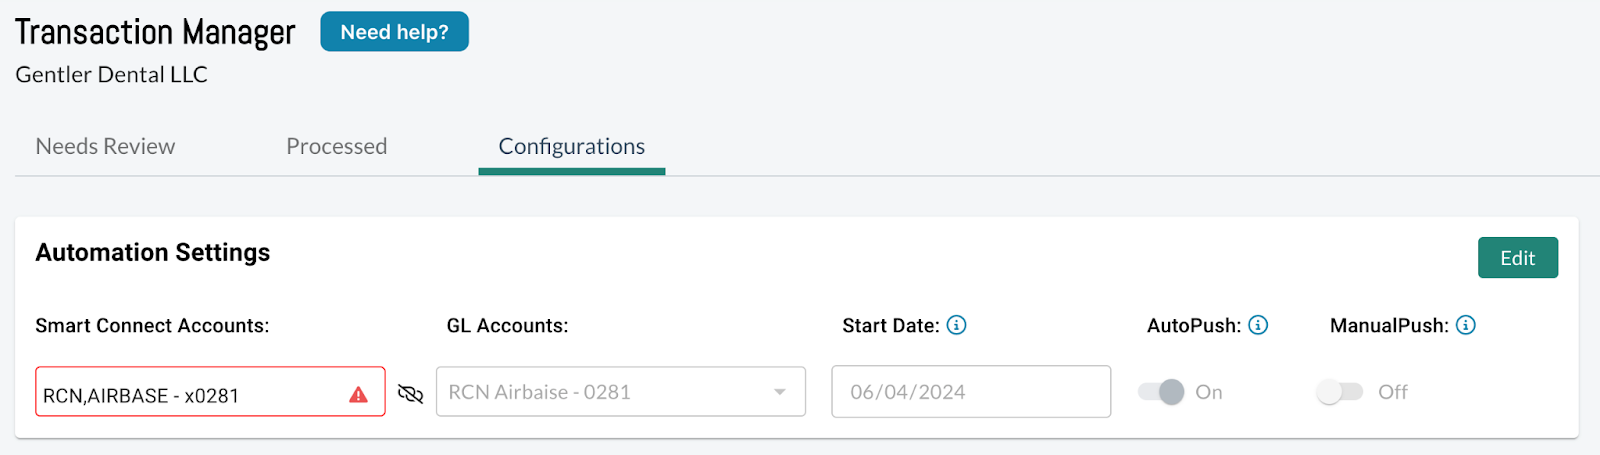
Go here for more information on these settings.
Step 5: Customize AI
In the same Configurations tab found in Transaction Manager referenced in step 4 above, you'll see the Additional Automation Settings. Here you can set the:
- Dates you'd like to train the machine on (you can select up to 24 months in the past).
- GL Automation Accounts you would like the platform to ingest from your client’s general ledger to be categorized by the machine.
- Accounts you would like the machine to omit learning from in your client's GL.
- A materiality threshold that if met or exceeded will require that transaction to be manually reviewed before posting to your client's GL regardless of its confidence rating.
- Named user the transactions should be sent to for review; if left blank these transactions will require a proactive review as no one will be notified that these transactions are sitting in the Needs Review tab.
- Whether you wish to send Low/Medium Confidence transactions to the GL
